
Product Attribute Targeting (PAT) lets you place Sponsored Products ads directly on specific ASINs, categories or attribute-filtered shelves instead of bidding against search queries. That single distinction changes how you should structure campaigns.
Run it as three separate jobs, never one blended ad group:
- Defence — target your own ASINs to protect your detail pages from competitor ads.
- Conquest — target competitor ASINs you can genuinely beat on price, reviews, or offer.
- Discovery — target categories or attribute buckets to find new shoppers and harvest fresh ASINs.
Amazon Ads recommends waiting for roughly 20 clicks on a target before deciding whether to negate it. Osellpa’s sellers use that same threshold as the baseline for automating negative lists across all three campaign jobs.
Key Takeaways
Product targeting works best when defence, conquest, and discovery run as separate campaigns with distinct KPIs, bids, and pruning rules rather than one blended ad group.
| Point | Details |
|---|---|
| Separate campaigns by job | Never mix defence, conquest, and discovery ASINs in the same ad group or bid strategy. |
| Wait for statistical signal | Hold off negating a target until it clears roughly 20 clicks, per Amazon’s own guidance. |
| Use refinements as filters | Apply price, rating, and Prime filters to category targets to avoid unwinnable placements. |
| Feed discovery into conquest | Promote category-targeting winners into curated ASIN lists once they prove they convert. |
| Automate the reporting grind | Tools like Osellpa apply profit-aware bid and negative-targeting rules across campaigns automatically. |
Table of Contents
- What is product targeting and how does PAT fit into Amazon Ads?
- Which target types should you use, and where do they show?
- Should you run automatic or manual product targeting?
- When should you choose ASIN, category, or attribute targeting?
- How do you set up a Sponsored Products product targeting campaign?
- How should you structure bids and budgets across campaigns?
- Which metrics and reports actually tell you if a target is working?
- How and when should you add negative product targets?
- What mistakes and platform limits should you watch for?
- What do working defence, conquest, and discovery campaigns look like?
- How does automation like Osellpa fit into product targeting workflows?
- Why product targeting demands separate playbooks, not one campaign
- Osellpa: automate the reporting side of product targeting
- Frequently asked questions about product targeting on Amazon Ads
- Sources
What is product targeting and how does PAT fit into Amazon Ads?
Product Attribute Targeting places your Sponsored Products, Sponsored Brands, or Sponsored Display ad against a specific ASIN, a whole category, or an attribute-filtered slice of the catalogue (price band, star rating, Prime eligibility) rather than a search term. Amazon confirms PAT spans all three ad formats, which means the same targeting logic can follow a shopper from a search results page through to a competitor’s detail page.
Keyword targeting matches intent. A shopper types “wireless earbuds” and you bid on that phrase. PAT matches context instead. A shopper is already looking at a specific product, browsing a category, or filtering by star rating, and your ad appears because of where they are, not what they typed.
Crucially, PAT doesn’t create a new ad format. It’s still a Sponsored Products placement; only the targeting logic changes, using your existing creative and product listing.
Typical placements include:
- Detail page carousels (“Products related to this item”)
- Related product modules further down the page
- Some browse and category-page slots
- Eligible off-Amazon placements for qualifying campaigns
Which target types should you use, and where do they show?
Four target types cover almost every job you’ll want PAT to do, and each one earns its place on a different part of the shelf.
ASIN targeting points your ad at one individual product. It’s the most surgical option, showing on that specific detail page or in its related-items carousel. Use it when you know exactly which competitor or complementary product you want adjacency with.
Category targeting casts a wider net across an entire product category, appearing in search grids and browse pages. On its own, it can pull in expensive, low-relevance traffic.
Category refinements (price bands, star rating, Prime eligibility, brand filters) narrow that net. Filtering a category to “4 stars and above, Prime eligible, £15 to £30” turns a blunt instrument into something closer to a scalpel. One analysis of PAT campaigns describes refinements as strategic selectors that convert broad category targeting into a genuine discovery engine.
Brand targeting and attribute buckets sit in between, letting you chase every ASIN under a competitor’s brand umbrella or a defined feature set.
| Target type | Where it shows | Best for |
|---|---|---|
| ASIN | Detail page carousels, related modules | Surgical conquest or defence |
| Category | Search grids, browse pages | Broad discovery |
| Category + refinements | Filtered browse/search slots | Discovery with quality control |
| Brand | Detail pages across a brand’s catalogue | Systematic conquest against one competitor |
Should you run automatic or manual product targeting?
Automatic targeting is Amazon’s discovery engine. Let it run for a data window, then pull the Placement report and Search Term report to see which ASINs and categories actually converted. It’s cheap intelligence, but the traffic quality is inconsistent because Amazon is guessing on your behalf.
Manual targeting is where you take that intelligence and act on it. Once you’ve identified converting ASINs from automatic data, or competitor products you already know deserve attention, curate a manual list. This is non-negotiable for conquest and defence campaigns, where blending in unqualified auto-matched traffic wastes budget on placements that were never going to convert.
The recommended flow:
- Launch an automatic campaign against your core ASINs.
- Let it collect data for at least one to two weeks, or until you have meaningful click volume per placement.
- Pull the Placement and Search Term reports and flag ASINs with strong conversion rates.
- Move those winners into a curated manual campaign, split by job (defence, conquest, discovery).
- Kill or negate the automatic targets that spent without converting.
| Automatic targeting | Manual targeting | |
|---|---|---|
| Role | Discovery | Execution |
| Control | Low | High |
| Best use | Finding new ASINs to target | Conquest, defence, curated complements |
| Data need | Minimal upfront | Requires prior data or research |
When should you choose ASIN, category, or attribute targeting?
Match the target type to the business goal, not the other way round. A defensive campaign protecting your bestseller’s detail page needs a completely different setup from a discovery campaign trying to find your product’s next customer segment.
Run through this checklist before building a campaign:
- Protecting an existing listing? Use ASIN targeting on your own products, defensive-only, low bids, judged on share of carousel rather than ACOS.
- Attacking a specific, beatable competitor? Use curated ASIN targeting, tight list, aggressive bids, judged on conversion rate and new-to-brand orders.
- Launching a new product with no organic visibility? Use category targeting with refinements, moderate bids, judged on impressions and early conversion signals.
- Finding complementary cross-sell opportunities? Use attribute-based or category targeting filtered tightly by relevance, low bids, judged on incremental sales.
ASIN targeting wins when you need precision, because you’re choosing exactly which shopper-in-context to intercept. Category and attribute targeting win when you need reach and are willing to accept a lower conversion rate in exchange for volume. Refinements act as a battlefield selector: filtering out 1 to 3 star products, non-Prime listings, or price points you can’t compete on stops you fighting placements you were never going to win.
| Goal | Best target type | Expected profile |
|---|---|---|
| Defence | ASIN (own products) | Low CPC tolerance, high visibility priority |
| Conquest | ASIN (competitor, curated) | Higher CPC, tighter ACOS ceiling |
| Discovery | Category + refinements | Lower CVR, higher reach |
| Complement | Attribute/category (narrow) | Moderate CVR, incremental focus |
How do you set up a Sponsored Products product targeting campaign?
Amazon’s own setup documentation walks through the mechanics, but the sequence below adds the decisions that actually determine performance.
- Create a new Sponsored Products campaign and name it by job, not by product. Something like “Defence, Category X, ASINs” beats “Campaign 14”.
- At the ad group level, select Product targeting rather than keyword targeting.
- Choose your target type: individual products (ASIN), categories, or a specific brand.
- Apply refinements if you’re targeting a category: price range, star rating, Prime eligibility, brand inclusion or exclusion.
- Set your bid. For conquest targets, start around 60 to 80% of what you’d bid on the equivalent keyword; for defence, start lower since you’re protecting share rather than chasing new conversions.
- Set a daily budget that can sustain at least 20 clicks per target within a reasonable window, so you can evaluate performance without waiting months.
- Launch, then flag the campaign for review in seven to ten days.
Before you launch, run through this checklist:
- One job per campaign. Never mix defence and conquest ASINs in the same ad group.
- Naming convention that states job, target level, and date launched.
- Separate budgets per job so a runaway conquest campaign can’t starve your defence spend.
- Bids set relative to keyword CPCs for the same product, not guessed from scratch.
- Placement tracking turned on from day one so you can see detail page versus search versus browse performance separately.
Pro Tip: Start conquest campaigns with a curated list of 10 to 15 ASINs rather than 50. A smaller list gets each target enough spend to reach the 20-click evaluation threshold faster, which means you make sharper decisions sooner.
How should you structure bids and budgets across campaigns?
Campaign architecture is where most PAT accounts quietly bleed money. Blending defence, conquest, and discovery into shared ad groups makes it impossible to judge whether a target is working, because you’re averaging three different success metrics into one number that means nothing.
Run four distinct campaign types:
- Defence — your own ASINs, low aggressive bids, success measured by carousel share.
- Conquest — curated competitor ASINs, higher bids, success measured by new-to-brand orders and ACOS.
- Discovery — category and attribute targets, moderate bids, success measured by impression volume and conversion signals worth escalating.
- Complement — cross-sell attribute targets, low bids, success measured by incremental order value.
Aggressive bidding is warranted here because you’re fighting for a placement your competitor currently owns. Defensive bids should sit lower, since you’re not trying to win a bidding war on your own detail page. You’re maintaining enough presence that a competitor’s ad doesn’t dominate the space.
Scale in this order:
- Let discovery campaigns run against broad, refined categories for two to four weeks.
- Pull the placement and conversion data, and flag any ASIN converting above your category average.
- Move those ASINs into a conquest list.
- Raise bids only on targets that have already cleared the 20-click evaluation threshold with a healthy ACOS.
- Re-review the full architecture monthly, retiring dead weight and reallocating budget towards the job producing the best return.
Which metrics and reports actually tell you if a target is working?
Judge each campaign job by different numbers, because a single blended ACOS target hides where the actual problem sits.
- Defence campaigns: track share of carousel and ACOS. A rising ACOS here often means a competitor has escalated bids to attack your own detail page.
- Conquest campaigns: track new-to-brand orders and hold a firm ACOS ceiling; conquest spend that isn’t bringing new customers isn’t doing its job.
- Discovery campaigns: track impression volume and ASIN-level conversion rate, since the goal is finding future conquest targets, not immediate profitability.
Two reports do most of the work: the Placement report tells you whether spend is concentrated on detail pages, search grids, or browse slots, and the Search Term report (relevant even for PAT via auto campaigns) surfaces ASINs worth manually targeting.
Set a cadence rather than checking sporadically:
- Daily: scan for spend anomalies, particularly on conquest campaigns where a competitor’s response can spike your CPC overnight.
- Weekly: prune targets that have cleared 20 clicks with no conversions and a poor ACOS.
- Monthly: review the full campaign architecture, checking whether discovery is feeding conquest at a healthy rate.
How and when should you add negative product targets?
Negative product targeting excludes specific ASINs or brands from continuing to receive your spend. Add negatives at the ad group level for surgical exclusions, or at the campaign level when an entire brand or category segment consistently underperforms.
Amazon’s own guidance sets the bar at roughly 20 clicks before you negate a target, giving enough signal to judge conversion honestly rather than reacting to noise.
- Prefer negative brand exclusions when an entire competitor’s catalogue is consistently unprofitable for you.
- Prefer individual ASIN negatives when only specific listings within a category are dragging down performance.
- Review your negative lists quarterly. Competitor pricing and reviews shift, and yesterday’s dead target can become tomorrow’s opportunity.
What mistakes and platform limits should you watch for?
The costliest mistake is mixing defence and conquest ASINs in one ad group, which makes performance data meaningless. A close second: running generic creative on conquest placements when the shopper is already comparing you against a specific competitor.
Watch for stock and offer-health issues suppressing delivery even when targeting is correct, and keep an eye on Amazon’s advertising status page during unexplained delivery dips. Red flags include high spend with zero conversions past the 20-click mark, or a target quietly cannibalising your organic sales rather than adding incremental revenue.
What do working defence, conquest, and discovery campaigns look like?
Three compact blueprints, ready to adapt.
Defensive campaign: target your own top 5 to 10 ASINs, bid low relative to category average, budget capped modestly. Success signal: maintained or improved carousel share and stable ACOS despite competitor pressure.
Conquest campaign: curate 10 to 20 competitor ASINs you can genuinely beat on price, rating, or offer. Target new-to-brand orders and hold a strict ACOS ceiling. Prune anything past 20 clicks with zero conversions.
Category-refined discovery campaign: target a category filtered to 4+ stars, Prime eligible, within your competitive price band. Cap monthly spend tightly. Success is measured in impressions and flagged ASINs, not immediate ACOS. Every four weeks, pull the top-converting ASINs and promote them into your conquest list.
- Launch all three simultaneously if budget allows, but track them completely separately.
- Feed discovery winners into conquest monthly.
- Retire conquest targets that never clear a healthy ACOS after 20 clicks.
How does automation like Osellpa fit into product targeting workflows?
Running defence, conquest, and discovery as genuinely separate jobs means tripling your reporting workload, which is exactly where automation earns its keep. Harvesting winning ASINs from placement reports, applying negative rules at the 20-click threshold, and keeping bid logic consistent across dozens of targets is tedious to do manually every week.

Osellpa connects directly to Amazon’s advertising API to pull placement and profit data automatically, applying bid rules and negative targeting based on real margin data rather than ACOS alone; a target with a low ACOS but thin margin can still be a bad target, and profit-aware automation catches that where a standard ACOS dashboard won’t.
If you’re introducing automation for the first time:
- Start in reporting-only mode, watching what the tool would flag before it acts.
- Test rule-based negation on one low-risk discovery campaign first.
- Scale to conquest and defence campaigns once you trust the flagged decisions.
Pro Tip: Run your first automated negative list against a discovery campaign, not a conquest campaign. The stakes are lower if the rule flags something you’d have kept.
Why product targeting demands separate playbooks, not one campaign
Product targeting rewards sellers who treat it as shelf real estate management, not a generic volume lever bolted onto keyword campaigns. The sellers who blend defence and conquest into one ad group are the ones asking, months later, why their ACOS looks fine on paper while their bestseller’s detail page is covered in competitor ads.
Set job-specific targets before you launch anything. A defence campaign judged by ACOS alone will look like it’s failing when it’s actually protecting share exactly as intended. Review your ASIN lists on a genuine schedule, not when something breaks.
Osellpa: automate the reporting side of product targeting
Building separate defence, conquest, and discovery campaigns is the right structure, but manually pulling placement reports and applying the 20-click rule across dozens of targets every week is where most sellers quietly give up and let campaigns drift. Osellpa handles that grind: it automates ASIN harvesting from your placement data, applies profit-aware bid recommendations instead of ACOS-only logic, and keeps reporting split by campaign job so defence, conquest, and discovery never get muddled into one misleading number.
Start by running a discovery report inside Osellpa and automating a negative list on one low-risk campaign to see the logic in action before trusting it on conquest spend. From there, try Osellpa and connect your Amazon Ads account to see your current PAT campaigns broken down by job, profit, and target performance.
Frequently asked questions about product targeting on Amazon Ads
What’s the difference between product targeting and keyword targeting? Keyword targeting matches a shopper’s search query. Product targeting matches context, placing your ad on a specific ASIN’s detail page, a category listing, or an attribute-filtered shelf regardless of what the shopper typed.
Can I use product targeting with Sponsored Brands and Sponsored Display, not just Sponsored Products? Yes. PAT is available across Sponsored Products, Sponsored Brands, and Sponsored Display, though this guide focuses on Sponsored Products setup and structure.
How many clicks should I wait for before negating a product target? Amazon recommends roughly 20 clicks as a minimum before judging a target’s performance and deciding whether to negate it.
Should I target competitor ASINs directly or their whole category? Target competitor ASINs directly when you can genuinely beat them on price, reviews, or offer quality. Use category targeting with refinements when you’re still discovering which competitors or segments are worth attacking.
What bid should I start with for a conquest campaign?
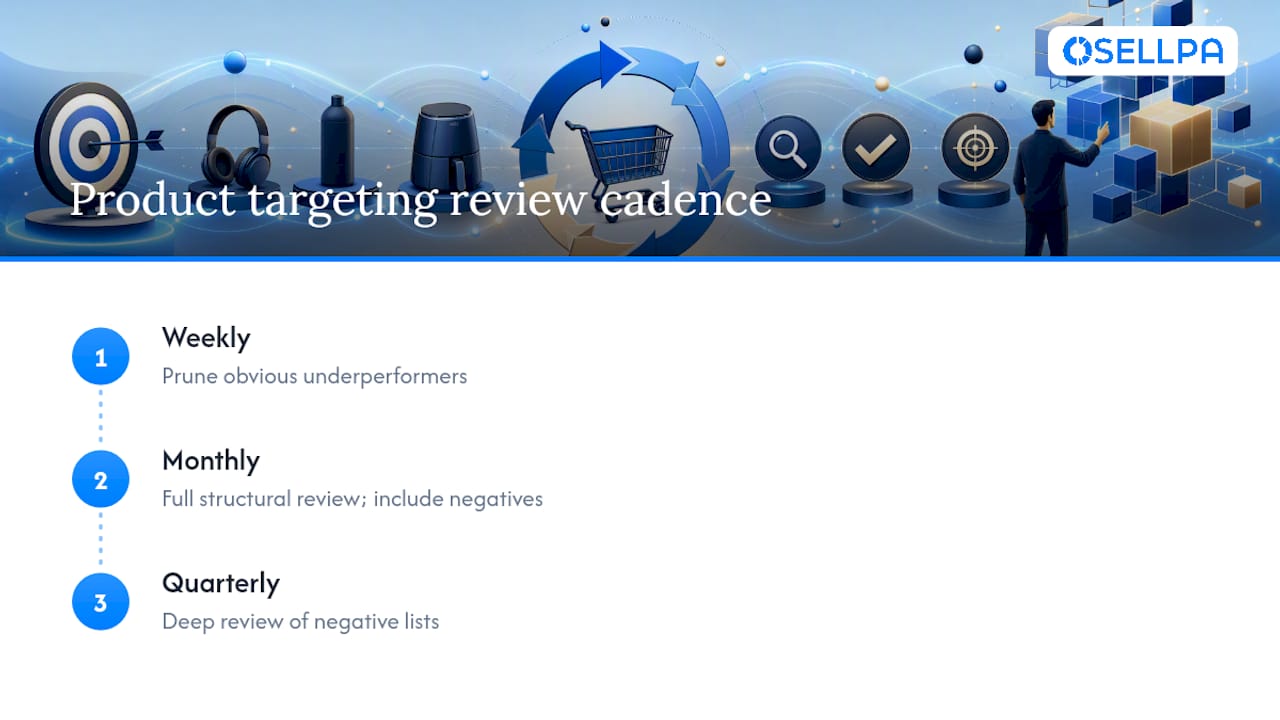
How often should I review my product targeting lists? Prune weekly for obvious underperformers, and run a full structural review, including negative lists, at least monthly. Competitor pricing and reviews shift constantly, so a quarterly deep review of negatives specifically catches stale exclusions.
Sources
Amazon’s own documentation covers exact configuration steps and feature definitions in detail.


