
A seven-step optimisation checklist — keyword research, title, bullet points, images, A+ content, backend search terms, and testing — will raise visibility and conversion for most UK Amazon listings within 30–90 days. Three Amazon tools sit at the centre of this process: Brand Registry (which unlocks Brand Analytics), Product Opportunity Explorer, and Manage Your Experiments.
Run these steps in order:
- Build your keyword list using Amazon autocomplete, Brand Analytics, and Product Opportunity Explorer
- Rewrite your title with the primary keyword front-loaded in the first 60 characters
- Rewrite all five bullet points using the Feature–Benefit–Proof structure
- Audit your images: main image on white, hero first, lifestyle and infographic shots following
- Update or create A+ Content with structured modules and complete product attributes
- Populate backend search terms with synonyms, misspellings, and long-tail variants not already in visible fields
- Run A/B tests via Manage Your Experiments and refresh keywords every 90 days
Most sellers who complete all seven steps see measurable improvements in click-through rate and conversion within the first month, with ranking gains compounding over the following quarter.
Key takeaways
Effective Amazon listing optimisation requires keyword research first, then title, bullets, images, A+ Content, backend terms, and systematic testing — in that order, repeated on a quarterly cadence.
| Point | Details |
|---|---|
| Keyword research comes first | Build a tiered keyword list before writing any copy; use Brand Analytics and Product Opportunity Explorer for UK-specific data. |
| Title carries the most weight | Place your primary keyword within the first 60 characters; this affects both indexing and mobile click-through rate. |
| Front-load bullets 1–3 | Mobile shoppers see roughly 70–80 characters before truncation; put your strongest benefit and proof in the first three bullets. |
| A+ Content feeds AI discovery | Complete every attribute field and use question-format headers so Rufus can surface your product in conversational search results. |
| Osellpa automates the cycle | Osellpa tracks keywords, manages PPC bids, and sends review requests automatically, with users reporting up to a 20% increase in sales. |
Table of Contents
- Why does Amazon listing optimisation change your rank?
- How to find and prioritise keywords for your Amazon listing
- How to write a title that ranks and converts
- How to write bullet points that convert browsers into buyers
- Should you use a product description or A+ Content?
- What images do you need, and in what order?
- How to use backend search terms correctly
- How pricing and promotions affect your ranking
- How to build reviews ethically and use social proof
- How to integrate Sponsored Ads and A/B tests into your launch plan
- What should you measure, and how often?
- Your copyable checklist and templates
- How Osellpa supports your optimisation workflow
- What UK sellers should actually prioritise first
- Osellpa gives UK sellers a faster path to listing performance
- Sources
Why does Amazon listing optimisation change your rank?
Amazon’s algorithm, commonly called A10, weighs two levers when deciding where your product appears: relevance and performance. Relevance is determined by where and how often your keywords appear across listing fields. Performance is driven by conversion rate, sales velocity, and click-through rate. The critical point is that a high conversion rate can outrank a listing with denser keyword coverage but weaker sales signals, according to Amazon’s own SEO guidance.
This means your listing is simultaneously a search document and a sales page. Getting the keyword placement right matters, but so does the quality of your copy, images, and pricing. A listing that ranks well but fails to convert will eventually lose ground to one that does both.
Amazon’s AI assistant Rufus now influences a meaningful share of product discovery. Listings with complete structured attributes rank better in AI-powered results because Rufus draws answers from attribute fields, not just keyword matches. Populate every available attribute in Seller Central, including material, size, colour, and compatibility fields.
For UK sellers specifically, a few additional checks apply:
- Use British English spellings throughout (colour, grey, aluminium, organise)
- State measurements in metric units (centimetres, kilograms, litres) unless the product category conventionally uses imperial
- Check that any regulatory or safety claims comply with UK Trading Standards requirements
- Confirm that product categories, certifications, and age restrictions reflect UK law, not US or EU standards
Brand Registry unlocks Brand Analytics and Product Opportunity Explorer, two tools that expose real search behaviour on Amazon.co.uk. If you are not yet enrolled, it is the single most valuable administrative step you can take before starting keyword research.
How to find and prioritise keywords for your Amazon listing
Keyword research comes before writing any copy. The order matters: a title written before you have a confirmed keyword list will almost always need rewriting.
Where to mine keywords
- Amazon autocomplete: type your root term into the Amazon.co.uk search bar and record every suggestion. These are real queries from real shoppers.
- Brand Analytics (Brand Registry required): shows search frequency rank and click share for terms, letting you see which queries convert, not just which ones get searched.
- Product Opportunity Explorer: surfaces unmet demand by showing search volume, conversion rates, and return rates for niche segments. Useful for finding gaps competitors have missed.
- Reverse ASIN tools: enter a competitor ASIN into a seller tool to extract the keywords that listing ranks for. Cross-reference with your own product’s relevance before adding them.
- Customer reviews: read your own reviews and competitor reviews for the exact language shoppers use. These phrases often outperform keyword-tool suggestions because they reflect real purchase intent.
Segmenting your keyword list
Organise terms into three tiers before writing a single word of copy:
| Tier | Description | Assigned field |
|---|---|---|
| Primary | Highest volume, most directly relevant | Title (first 60 characters) |
| Secondary | Strong relevance, moderate volume | Bullets 1–3, backend search terms |
| Long-tail | Specific, lower volume, high intent | Bullets 4–5, backend search terms, A+ copy |
Deduplicate before assigning. A term in your title does not need to appear in your backend search terms — Amazon indexes it from the visible field.
Pro Tip: Mine the “Customers also bought” and “Frequently bought together” sections on competitor listings. The products that appear there share a customer base with yours, and their titles reveal secondary keyword clusters worth adding to your backend terms.
UK-specific note: search behaviour on Amazon.co.uk differs from Amazon.com. “Nappy” outperforms “diaper”, “torch” outperforms “flashlight”, and “jumper” outperforms “sweater”. Run your root terms on Amazon.co.uk specifically, not a US tool, before finalising your list.
How to write a title that ranks and converts
Your title is the single most important field in your listing. It carries the heaviest keyword weight and is the first thing a shopper reads. Amazon’s A10 algorithm penalises keyword stuffing, so a title that reads naturally while front-loading your primary term will outperform a packed string of disconnected keywords.
Recommended title structure
[Brand] + [Primary keyword] + [Key differentiator] + [Variant/size/count]
Example: BrightHome Blackout Roller Blind | Thermal, Child-Safe | 90 x 160 cm
Keep the primary keyword within the first 60 characters. On mobile, Amazon truncates titles at roughly that point, so anything beyond it may not be visible in search results.
Title dos and don’ts
Do:
- Place your most important keyword as close to the start as possible
- Include the variant detail (size, colour, pack count) that shoppers use to filter
- Keep the title readable aloud — if it sounds like a list of keywords, rewrite it
- Use standard British English spellings and metric measurements
Don’t:
- Include promotional phrases such as “Best Seller”, “Sale”, “Free Shipping”, or “Guaranteed”
- Use ALL CAPS for anything other than abbreviations (e.g. LED, UV, UK)
- Repeat the same keyword twice in the title
- Include seller name unless it is a recognised brand
Adaptable title templates
- Consumable/supplement:
[Brand] [Product type] [Key benefit] | [Count/strength] | [Certification if relevant] - Home/kitchen:
[Brand] [Product] [Material/finish] | [Size] | [Key feature] - Electronics accessory:
[Brand] [Product] Compatible with [Device] | [Key spec] | [Colour/variant]
How to write bullet points that convert browsers into buyers
Bullet points are your listing’s sales pitch. They are where shoppers decide whether to add to basket or keep scrolling. The structure that consistently performs best pairs a capitalised feature heading with a clear benefit and a short proof or specification.
The Feature–Benefit–Proof model
Feature: what the product has or does Benefit: what that means for the buyer Proof: a specification, certification, or concrete detail that backs the claim
Example of a weak bullet: Thermal lining included.
The model works because it answers the shopper’s implicit question: “So what?” in the same sentence.
Most categories allow up to 500 characters per bullet, but mobile shoppers see only roughly 70–80 characters before the listing collapses. Bullets 1–3 carry the most conversion weight on mobile, so front-load your strongest benefit and compatibility information there. Bullets 4 and 5 can carry technical specifications and secondary features.
Before (generic): High quality material used in construction. After (Feature–Benefit–Proof): AIRCRAFT-GRADE ALUMINIUM FRAME — lightweight at 320g yet rated to 150kg load, with a 2-year manufacturer warranty included.
Pro Tip: Copy the most repeated phrases from your five-star reviews and mirror that language in bullets 1 and 2. Shoppers trust copy that sounds like people they identify with, and Amazon’s algorithm rewards listings where review language and bullet language align.
Should you use a product description or A+ Content?
If you are enrolled in Brand Registry, A+ Content replaces the plain product description for most shoppers. The plain description remains in the listing data and is still indexed, but A+ modules are what shoppers see on the detail page. Use both, not one or the other.
Product descriptions influence SEO through keyword indexing and structured content signals, so write the plain description as a keyword-rich paragraph even when A+ is live. Keep it under 2,000 characters, write in full sentences, and include secondary and long-tail keywords that did not fit naturally in the title or bullets.
For A+ Content, the tactics that improve both conversion and AI discovery are:
- Use question-format module headers: “Which size fits my window?” performs better with Rufus than “Product dimensions” because it matches conversational search queries
- Complete every attribute field: colour, material, finish, compatibility, and any category-specific attributes. Structured attribute completeness measurably improves ranking in AI-powered search results
- Include a comparison chart: even a simple comparison between your own variants helps shoppers self-select and reduces returns
- Write A+ copy in plain, benefit-led language: avoid marketing superlatives; Rufus draws factual answers from attribute text, not promotional copy
What images do you need, and in what order?
Images are the fastest conversion lever in your listing. A shopper decides whether to click within a fraction of a second, and that decision is almost entirely visual. Getting the sequence and technical quality right is non-negotiable.

Technical requirements
Amazon’s official image guidelines require the main image to show the product on a pure white background (RGB 255, 255, 255) with no text overlays, no watermarks, and no additional props. The product must fill at least 85% of the image frame. Minimum resolution is 1,000 pixels on the longest side to enable zoom; 2,000 pixels or above is preferable. Failing these rules triggers listing suppression.
Recommended image sequence
- Hero image: product on white, filling the frame, meeting all technical rules
- Scale/context image: product shown next to a common object or in situ so shoppers understand size
- Lifestyle image: product in use by a person who represents your target buyer
- Infographic: key features called out with short text labels and icons
- What’s included: all box contents laid out flat, clearly labelled
- Optional video: 30–90 seconds showing the product in use; video consistently lifts conversion
Pro Tip: Alt text on your images is indexable copy. Write descriptive, keyword-relevant alt text for every image rather than leaving it blank or using a file name. This is especially useful for secondary keywords that did not fit in your title or bullets.
How to use backend search terms correctly
Backend search terms are the field in Seller Central that shoppers never see but Amazon indexes. They exist to capture search queries that do not fit naturally into visible copy. Use them strategically, not as a SEO dumping ground.
Formatting rules:
- Enter terms as space-separated words, not comma-separated phrases
- Use all lowercase
- Do not repeat words already in your title, bullets, or description — Amazon indexes those fields separately
- Stay within the byte limit for your marketplace (250 bytes on Amazon.co.uk for most categories)
- Do not include competitor brand names or ASINs
What to include:
- Common misspellings of your product name or category term
- Synonyms and regional variants (e.g. “duvet” and “quilt” for the same product)
- Abbreviations and alternate formats (e.g. “LED” and “light emitting diode”)
- Long-tail phrases that are too specific or awkward to include in visible copy
- Complementary use cases (e.g. “gift for runner” for a sports water bottle)
The byte limit is tight, so every term must earn its place. Count bytes, not characters — some special characters consume more than one byte.
How pricing and promotions affect your ranking
Price is a ranking signal on Amazon because it directly affects conversion rate, and conversion rate feeds the algorithm. A product priced significantly above the category average will convert at a lower rate, which suppresses rank over time.
When to use temporary price drops:
Use a limited-time price reduction or coupon to kickstart conversion velocity on a new or relaunched listing. A short burst of sales at a lower margin can lift rank enough to generate organic sales at full price. The maths only work if you plan the margin impact before running the promotion.
Coupons vs Lightning Deals:
Coupons appear in search results as a green badge and improve click-through rate without requiring you to commit to a specific volume. Lightning Deals require Amazon approval, a minimum inventory level, and a deeper discount, but they drive higher short-term velocity. For most UK sellers, coupons are the lower-risk starting point.
Pro Tip: *UK pricing must be VAT-inclusive in the displayed price. When calculating your promotional floor price, work backwards from the VAT-inclusive amount to confirm your net margin before committing to a deal.
The Buy Box is also a ranking factor. If you share a listing with other sellers, winning the Buy Box consistently requires competitive pricing, strong seller metrics (order defect rate below 1%, late shipment rate below 4%), and reliable stock levels.
How to build reviews ethically and use social proof
Reviews affect both conversion rate and ranking. A listing with a strong star rating and a meaningful number of reviews converts at a higher rate, which feeds the algorithm. The challenge is building that base without violating Amazon’s Terms of Service.
Compliant review acceleration options:
- Vine programme: enrol eligible ASINs to receive reviews from Amazon’s trusted reviewer community. Available to Brand Registry members; particularly effective for new listings with zero reviews
- Request a Review button: use the manual button in Seller Central or automate the request via a compliant tool. The optimal timing is 5–7 days after confirmed delivery, when the product experience is fresh
- Follow-up messaging: Amazon’s Buyer-Seller Messaging allows one follow-up message per order. Keep it brief, helpful, and never conditional on a positive review
Using review language in your copy:
Read your reviews for recurring phrases and include them in bullets and A+ copy. If multiple reviewers describe a product as “easy to assemble”, that phrase belongs in bullet 3. This is not manipulation — it is mirroring the language your buyers already use.
Review dos and don’ts:
- Do automate review requests within Amazon’s permitted window
- Do respond to negative reviews professionally and factually
- Do not offer incentives, discounts, or gifts in exchange for reviews
- Do not ask for positive reviews specifically — the request must be neutral
- Do not use third-party services that solicit reviews outside Amazon’s system
How to integrate Sponsored Ads and A/B tests into your launch plan
Advertising and listing optimisation work together. A well-optimised listing converts paid traffic more efficiently, which lowers your Advertising Cost of Sale (ACoS) and improves organic rank simultaneously.
Launch campaign checklist:
- Start with an automatic Sponsored Products campaign to harvest keyword data for the first two weeks
- Move confirmed converting keywords into a manual Sponsored Products campaign with exact and phrase match
- Add a Sponsored Brands campaign once you have three or more ASINs or a strong hero product with video
- Tag any off-Amazon traffic (social, email, influencer) with Amazon Attribution links to measure the halo effect on organic rank
Using Manage Your Experiments:
Manage Your Experiments is Amazon’s native A/B testing tool, available to Brand Registry members. It lets you test two versions of a title, main image, or A+ Content module against each other on live traffic.
Requirements and best practice:
- Run each experiment for a minimum of four weeks to reach statistical significance
- Test one variable at a time — changing both the title and the image in the same experiment makes it impossible to know which change drove the result
- Watch conversion rate and units sold as primary metrics; impressions alone do not indicate a winner
Key metrics to track:
- ACoS (Advertising Cost of Sale): ad spend divided by ad revenue. Lower is better, but the right target depends on your margin
- TACoS (Total Advertising Cost of Sale): ad spend divided by total revenue including organic. A falling TACoS over time indicates that advertising is lifting organic rank
- Conversion rate by keyword: available in Brand Analytics; shows which search terms actually lead to purchases, not just clicks
Pro Tip: Combine Amazon Attribution links with a short email sequence to your existing customer base when relaunching an optimised listing. External traffic that converts signals strong demand to the algorithm and can accelerate organic rank faster than paid traffic alone.
What should you measure, and how often?
Treating optimisation as a repeating cycle rather than a one-time task is what separates sellers who compound gains from those who plateau. The cadence below gives you a structured schedule without requiring daily manual work.
| Frequency | Task | Metric to watch |
|---|---|---|
| Weekly | Review impressions, CTR, and conversion rate in Business Reports | Spot sudden drops that indicate suppression or a ranking shift |
| Weekly | Check ACoS and TACoS in Campaign Manager | Identify wasted spend and adjust bids |
| Monthly | Review keyword rank for primary and secondary terms | Add new terms, pause underperformers |
| Quarterly | Run image A/B test via Manage Your Experiments | Conversion rate improvement vs control |
| Quarterly | Keyword refresh: mine Brand Analytics for new high-volume terms | Search frequency rank movement |
| Every 6 months | Full A+ Content audit: update modules, refresh attribute fields | Conversion rate and Rufus discovery |
A minimum of four weeks of data is needed before drawing conclusions from any A/B test. Shorter windows produce noise, not signal.
Your copyable checklist and templates
One-page optimisation checklist
Priority 1 — Complete in week 1 (30–60 minutes each):
- Run keyword research using Amazon autocomplete, Brand Analytics, and Product Opportunity Explorer
- Rewrite title using the recommended structure; confirm primary keyword is within the first 60 characters
- Rewrite all five bullets using the Feature–Benefit–Proof model; front-load bullets 1–3
- Populate backend search terms with synonyms, misspellings, and long-tail variants; stay within 250 bytes
Priority 2 — Complete in week 2 (1–2 hours each):
- Audit all images against Amazon’s technical rules; replace any that violate the main image requirements
- Write or update A+ Content with question-format headers and a comparison chart
- Complete every attribute field in Seller Central for your ASIN
Priority 3 — Ongoing:
- Set up a Sponsored Products auto campaign to harvest keyword data
- Enrol in Vine if the ASIN is new and you have Brand Registry
- Schedule your first Manage Your Experiments test (title or main image)
Title templates
- Home goods:
[Brand] [Product] [Material] | [Size/Colour] | [Key feature, e.g. Thermal/Waterproof] - Supplements:
[Brand] [Product name] [Strength/Count] | [Key benefit] | [Certification, e.g. Vegan, GMP] - Electronics accessory:
[Brand] [Product] for [Compatible device] | [Key spec] | [Colour/Pack size]
Bullet template (Feature–Benefit–Proof)
[CAPITALISED FEATURE HEADING] — [benefit in plain language], [proof: spec, certification, or concrete detail].
Backend search string example
blackout blind thermal roller blind window blind bedroom blind child safe blind 90cm 150cm 180cm
No commas. No repeated words from the title. All lowercase. Count bytes before saving.
How Osellpa supports your optimisation workflow
Managing keyword tracking, PPC campaigns, profit margins, and A/B test schedules manually across a growing catalogue is where most sellers lose time and accuracy. Osellpa is built to handle that operational layer directly.
What Osellpa does:
- Tracks profit in real time by pulling data directly from Amazon’s API, removing the need for manual spreadsheet reconciliation
- Monitors competitor keywords and flags ranking shifts so you can respond before a drop becomes significant
- Automates PPC campaign management, adjusting bids based on performance data to reduce wasted ad spend
- Sends automated review requests within Amazon’s permitted window, timed for optimal response rates
- Provides AI-driven listing enhancement suggestions based on your current keyword data and conversion metrics
- Manages inventory alerts and reimbursement tracking alongside listing performance data
Getting started takes three steps: sign up for a trial at Osellpa, connect your Amazon Seller Central account via the API, and run your first listing audit using the built-in template. From there, the platform surfaces the highest-priority changes for each ASIN, so you are working on what matters most rather than guessing.
What UK sellers should actually prioritise first
Most articles on listing optimisation treat every step as equally urgent. They are not. After working through the evidence on what actually moves rank and conversion, three actions stand out as the highest-leverage starting points for UK sellers specifically.
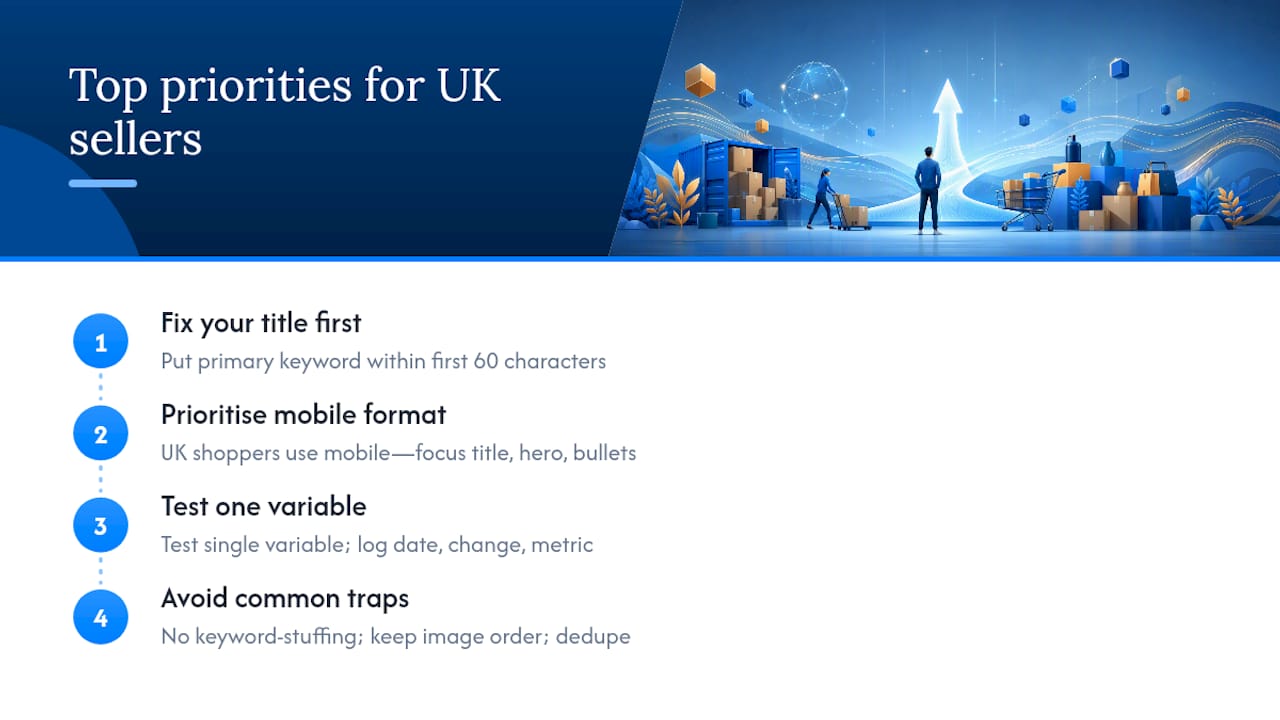
First: fix your title before anything else. The title is the only field that affects both indexing and click-through rate simultaneously. A weak title suppresses every other optimisation you make. Rewrite it with the primary keyword in the first 60 characters, and the rest of the work becomes more effective.
Second: treat mobile as your primary format. The majority of Amazon shopping in the UK happens on mobile devices. That means your first three bullets, your hero image, and your title truncation point are what most shoppers actually see. Sellers who optimise for desktop and then check mobile are working in the wrong order.
Third: run one experiment at a time, and document every change. The most common mistake I see is sellers making three or four changes simultaneously and then not knowing what worked. Manage Your Experiments only tests one variable per experiment, and that constraint is a feature, not a limitation. Keep a simple change log with the date, what you changed, and the metric you are watching. Over six months, that log becomes a genuine competitive advantage.
The traps to avoid: over-optimising titles with keyword strings that read as robotic (Amazon’s algorithm now penalises this), ignoring image order (the hero image is not the only one that matters), and treating the backend search terms field as a place to dump every keyword you found. Deduplicate, stay within the byte limit, and use that space for terms that genuinely add coverage.
Osellpa gives UK sellers a faster path to listing performance
Sellers who want to run the full seven-step process without building a manual tracking system have a direct route with Osellpa’s analytics and automation tools. The platform connects directly to Amazon’s API, so profit data, keyword rankings, PPC performance, and listing metrics are visible in one place rather than spread across Seller Central reports and spreadsheets.
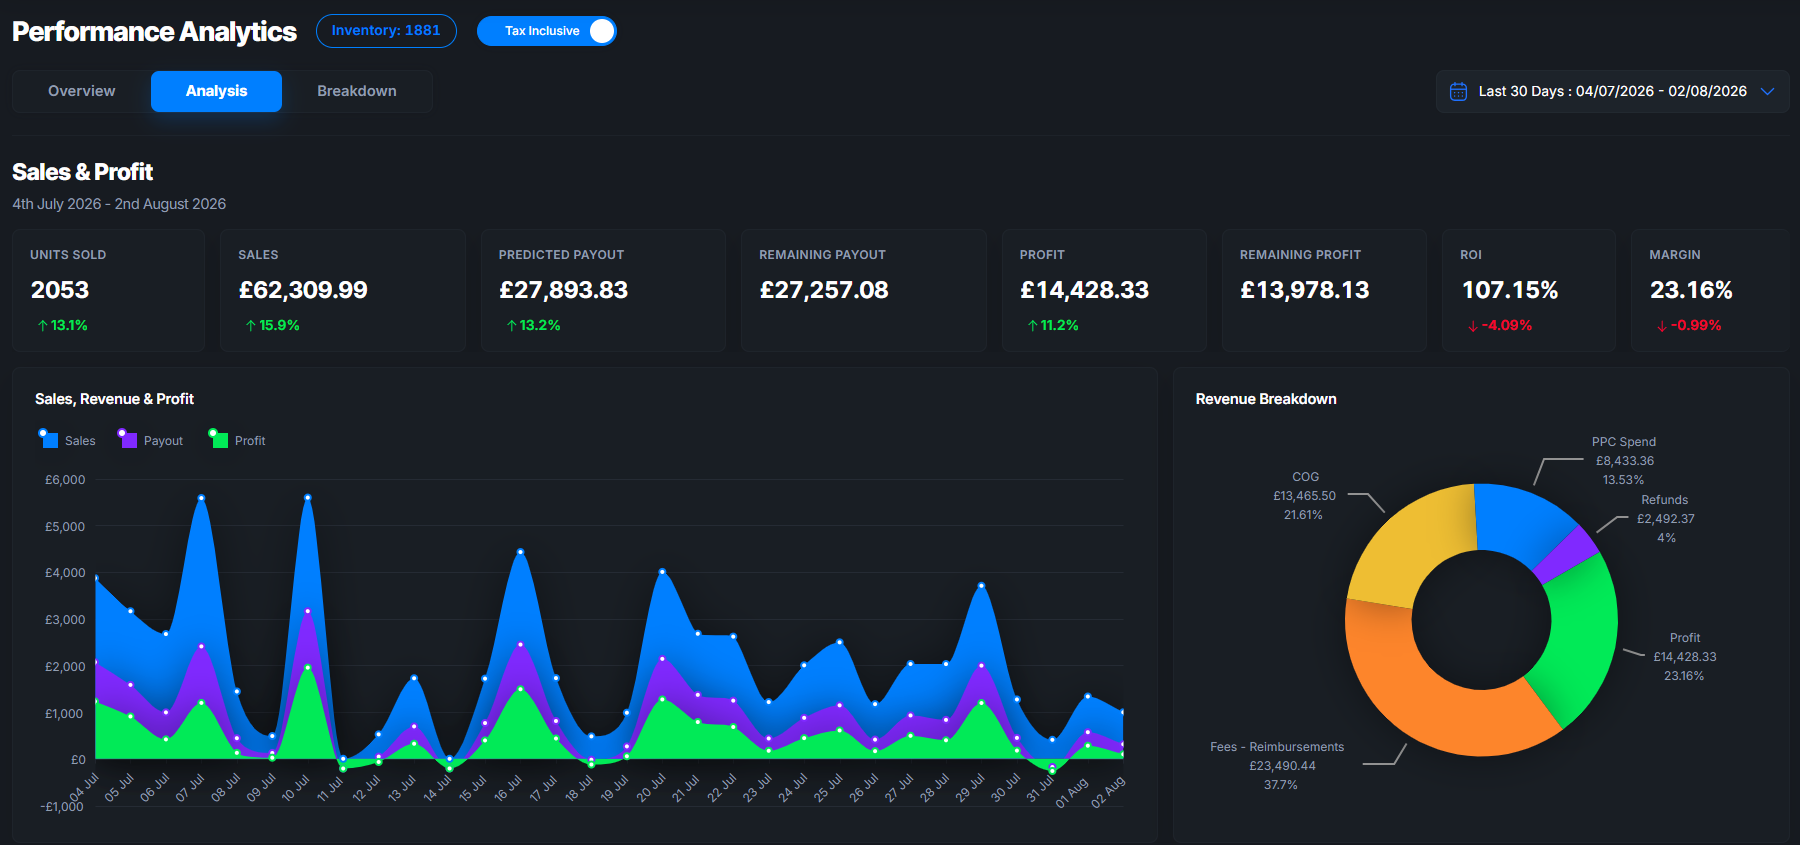
For UK sellers managing VAT-inclusive pricing, margin tracking, and the specific search behaviour of Amazon.co.uk shoppers, Osellpa’s profit and loss reporting gives you the margin visibility to run promotions confidently. The automated PPC management reduces wasted ad spend without requiring daily bid adjustments, and the AI listing enhancement tools surface keyword gaps and copy improvements based on live data.
Start a trial at Osellpa, connect your Seller Central account, and run your first listing audit. The platform identifies which of your ASINs have the highest optimisation potential, so you can prioritise the changes that will move the needle fastest.
Sources
Official Amazon resources:
- Amazon SEO: How to Optimize Your Listing to Rank
- How to Optimize Your Amazon Listings for AI-Powered Search in 2026 – Ecommerce Times
- Seller Central help — image and listing guidance (external G10471)
Industry guides:
Operational tool: